Can I Remove Asbestos Myself in Auckland? The Real Risks, the Law, and the Safe Way to Do It
Can You Remove Asbestos Yourself in Auckland?
Short answer: sometimes.
Smart answer: rarely.
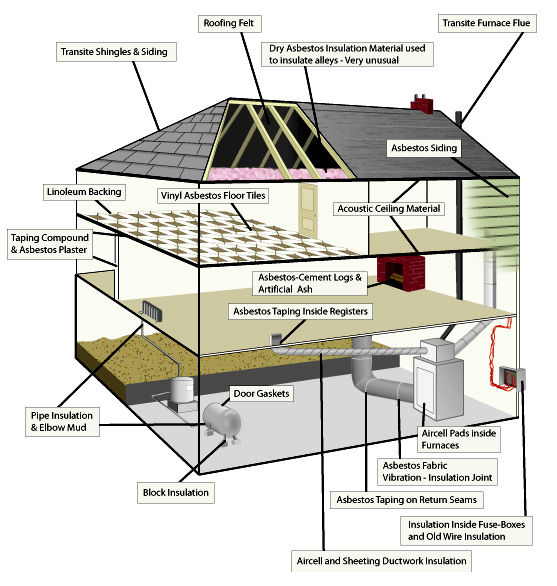
Asbestos is one of those materials that looks harmless right up until it isn’t. Old fences, garage cladding, soffits, sheds, vinyl tiles, roofing — Auckland is full of it. And yes, New Zealand law does allow limited DIY asbestos removal. But what the law allows and what’s sensible are two very different things.
This article explains:
- What you’re legally allowed to remove yourself
- Why most DIY asbestos jobs go sideways
- The real risks people underestimate
- How Class B asbestos removal should actually be done, using a step-by-step Safe Work Procedure
- And when it’s smarter to call a professional like PropertyHelp Ltd
All explained in plain language — not regulator-speak.
What the Law Says (Plain English, No Spin)
Under the Health and Safety at Work Act 2015 and the Health and Safety at Work (Asbestos) Regulations 2016:
You may remove small amounts of non-friable asbestos (typically asbestos cement) yourself only if:
- It’s less than 10m²
- It’s in good condition
- You don’t break it
- You don’t expose anyone else
- You dispose of it correctly
The moment you:
- Break it
- Remove more than 10m²
- Work near neighbours or public areas
- Create dust
…it becomes Class B asbestos removal, and that’s no longer a casual DIY job.
The law doesn’t protect you from bad outcomes — it only defines minimum thresholds.
The Risks People Seriously Underestimate
DIY asbestos removal usually fails in the same predictable ways:
- Sheets snap (especially fences and garage cladding)
- Dust gets into soil
- Fibres spread beyond the work area
- Neighbours complain
- WorkSafe gets involved
- Cleanup costs exceed professional removal
Asbestos doesn’t give instant feedback. You don’t cough. You don’t smell anything. You just contaminate your property quietly and permanently.
That’s the trap.
When It Becomes Class B Asbestos Removal
You are squarely in Class B asbestos territory if you’re removing:
- Asbestos fences or fence panels
- Garage cladding or wall sheets
- Asbestos soffits or eaves
- Cement roofing (including Decramastic)
- More than 10m² of asbestos material
At that point, a controlled, professional process is not just safer — it’s defensible.
Step-by-Step Safe Work Procedure – Class B Asbestos Removal (How It Should Be Done)
5
Step 1: Assume It’s Asbestos Until Proven Otherwise
Materials are treated as asbestos unless testing proves they’re not Condition is assessed (cracks = higher risk) The job is planned to keep sheets wholeGuessing is how asbestos ends up in the ground.
Step 2: Lock Down the Site
Before removal starts:
- Exclusion zones are set up
- Asbestos warning signage is installed
- Neighbours, pets, and bystanders are kept out
- A waste-handling path is planned
If people can wander past, the setup has already failed.
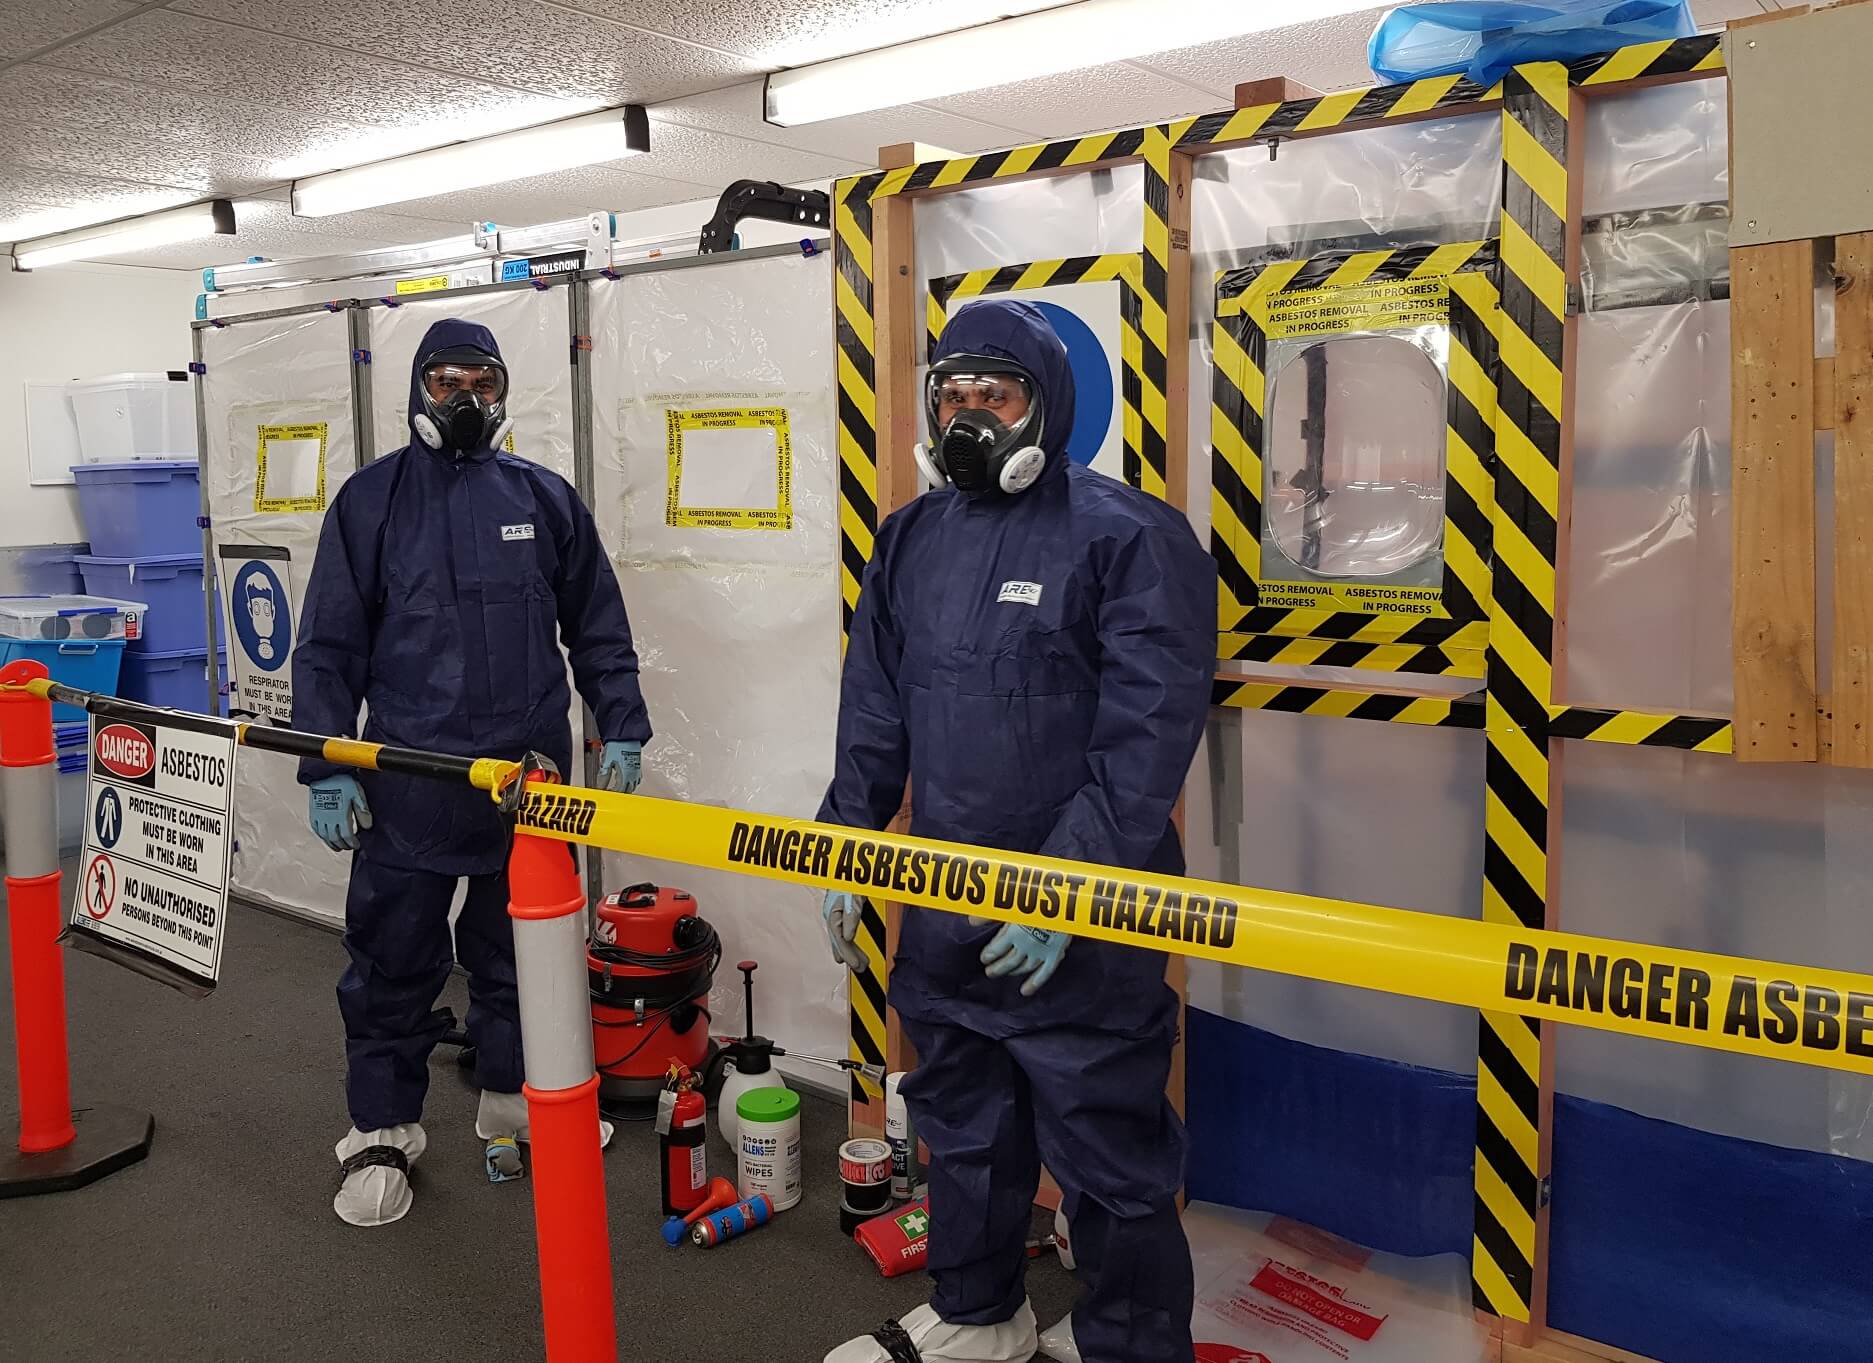
Step 3: PPE Goes On First
Anyone doing the work wears:
- Disposable asbestos coveralls (Type 5/6)
- Fit-tested P2 or P3 respirator
- Gloves and eye protection
- Controlled footwear or disposable boot covers
This is not optional. It’s the baseline.
Step 4: Wet the Material
Dry asbestos is dangerous asbestos.
- Material is lightly misted (low pressure only)
- Kept damp throughout removal
- Never water-blasted, sanded, or scrubbed
Water keeps fibres stuck where they belong.
Step 5: Remove Fixings by Hand
- Screws and nails removed by hand only
- No grinders, drills, or power tools
- If something won’t move, the method changes — not the force
Speed breaks sheets. Broken sheets break the rules.
Step 6: Lift Sheets Whole
- Sheets are supported to avoid flexing
- Lifted carefully
- Lowered intact — never dropped or snapped
If it cracks, work stops.
Step 7: Wrap and Seal Immediately
As soon as material is down:
- Wrapped in 200-micron plastic
- Fully sealed and taped
- Clearly labelled as asbestos waste
- Stored securely away from access points
Loose asbestos waste is how contamination spreads.
Step 8: Decontaminate
Before leaving site:
- Tools are wet-wiped
- PPE is removed in the correct order
- Disposable PPE goes with asbestos waste
- Hands and face are washed thoroughly
No one leaves carrying fibres home.
Step 9: Final Inspection
The job only finishes when:
- No visible debris remains
- Surrounding ground is clean
- Signage is removed safely
- The site is handed back uncontaminated
So… Should You Remove Asbestos Yourself?
Legally? Sometimes.
Practically? Rarely a good idea.
DIY asbestos removal often costs more after it goes wrong. Using a professional asbestos removalist like PropertyHelp Ltd means:
- The job is legal
- The risk is contained
- Your property remains sale-ready
- You don’t inherit a contamination problem that never fully disappears
Final Word
Asbestos removal isn’t about confidence or toughness — it’s about control, patience, and boring discipline. That’s what keeps fibres out of the air and out of your future.
If you’re even asking whether you should DIY asbestos removal, that’s usually your answer.
Make Enquiry