Asbestos Fence Removal in Auckland – The Legal, No-Nonsense Way to Remove Class B Asbestos
Asbestos Fence Removal: What Should Actually Happen on Site (Not the Shortcut Version)
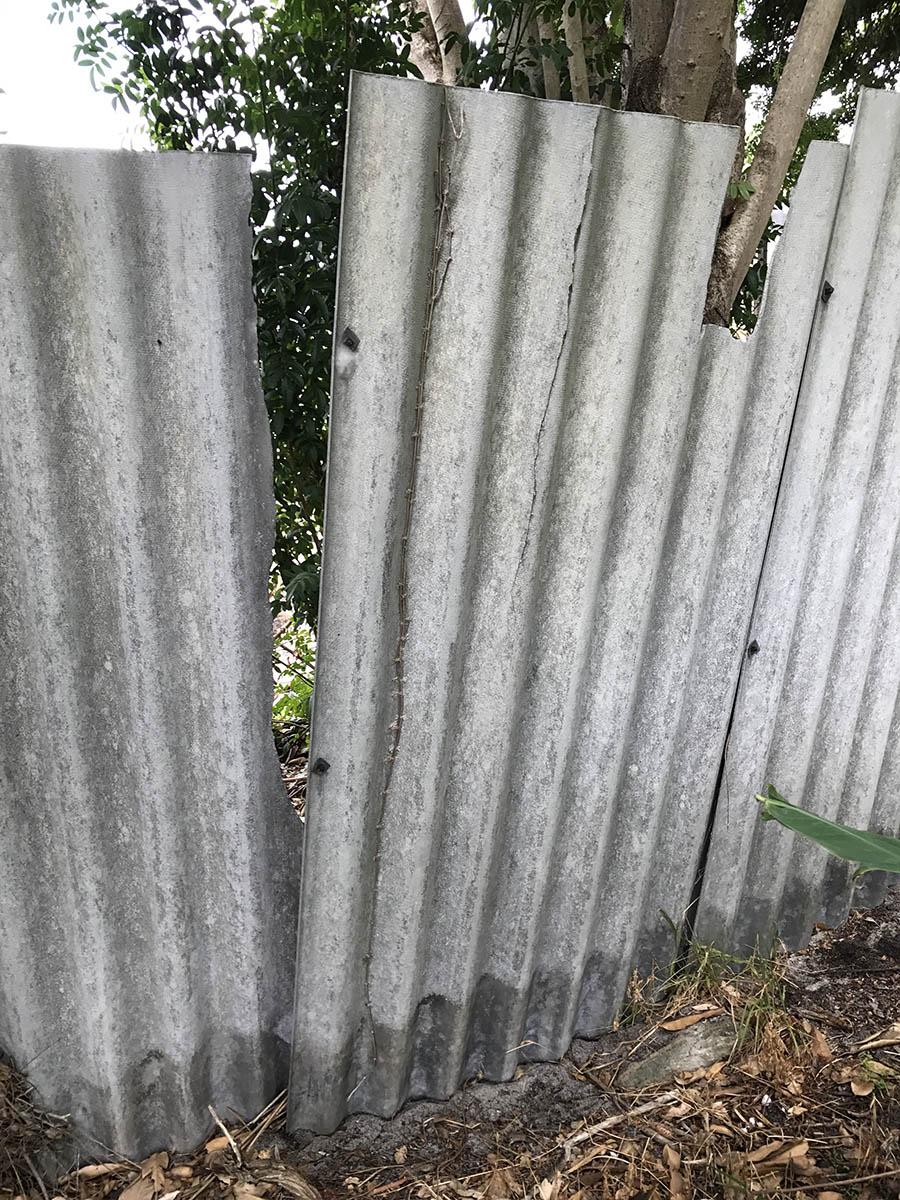
Old boundary fences are one of the quietest asbestos risks around New Zealand homes. Flat fibre-cement panels, corrugated sheets, patched repairs — many fences built before the late 1980s contain asbestos cement, which makes removal Class B asbestos work under New Zealand law.
This is not demolition. It’s not landscaping. And it’s definitely not a “rip it out on the weekend” job.
Below is a plain-spoken, step-by-step guide to how a professional asbestos removalist like PropertyHelp Ltd removes an asbestos fence lawfully, safely, and without contaminating your property, in line with the Health and Safety at Work Act 2015 and the Asbestos Regulations 2016.
Why Asbestos Fences Are Riskier Than They Look
Asbestos fence sheets are often:
- Weathered and brittle
- Buried into soil or concrete
- Snapped at the bottom from ground movement
- Right on the boundary line with neighbours
Once an asbestos fence breaks, fibres don’t politely stay put — they float, drift, and settle into soil, gardens, and driveways. That’s when a simple removal turns into a contamination problem.
The Legal Reality (Straight Up)
Under NZ law:
- Asbestos fence removal is Class B asbestos removal
- Fibre release must be prevented, not cleaned up later
- Workers must be trained and competent
- Homeowners can still be held responsible if asbestos is mishandled
If a fence snaps and fibres enter the ground, that problem doesn’t age out — it stays with the property.
Step-by-Step Safe Work Procedure for Asbestos Fence Removal

5
Step 1: Confirm and Assume Asbestos
Before anything moves:
- Fence panels are assumed to contain asbestos unless testing proves otherwise
- Condition is checked for cracks, breaks, or weathering
- Removal is planned to keep panels intact
Guesswork is how asbestos ends up in soil.
Step 2: Set Up the Site Properly
This is where safe jobs separate from messy ones:
- An exclusion zone is established along the fence line
- Asbestos warning signage is installed
- Neighbours, pets, and bystanders are kept out
- A clear waste-handling path is planned
If people can wander past while you’re working, the setup is wrong.
Step 3: PPE Before Contact
Before touching the fence:
- Disposable asbestos coveralls (Type 5/6)
- Fit-tested P2 or P3 respirator
- Gloves and eye protection
- Controlled footwear or disposable boot covers
This isn’t being cautious — it’s meeting the legal minimum.
Step 4: Wet the Fence Panels
Dry asbestos is the enemy.
Fence sheets are:
- Lightly misted with water (low pressure only)
- Kept damp during removal
- Never water-blasted, sanded, or scrubbed
Water keeps fibres glued where they belong.
Step 5: Release Panels by Hand
This part is slow by design:
- Fixings are loosened by hand only
- No grinders, drills, or impact tools
- If panels are set into concrete, the ground is carefully exposed rather than forcing the sheet
Speed breaks sheets. Broken sheets mean contamination.
Step 6: Lift and Lower Panels Whole
Panels are:
- Lifted carefully from posts or rails
- Lowered intact
- Never snapped, dropped, or folded
If a panel won’t come free, the method changes — force is not an option.
Step 7: Wrap and Seal Immediately
As soon as a panel is down:
- Wrapped in 200-micron plastic
- Fully sealed with tape
- Clearly labelled as asbestos waste
- Stored securely away from access points
Loose asbestos waste is how fibres leave the site.
Step 8: Decontaminate Tools and People
Before leaving:
- Tools are wet-wiped
- PPE is removed in the correct order
- Disposable PPE goes with asbestos waste
- Hands and face are washed thoroughly
No one leaves carrying asbestos dust with them.
Step 9: Final Inspection and Handover
The job only finishes when:
- The fence line is visually clean
- No fragments remain in soil or grass
- Warning signage is removed safely
- The area is handed back uncontaminated
Why DIY Asbestos Fence Removal Usually Backfires
Fences look simple. Asbestos isn’t.
DIY jobs often end with:
- Broken sheets
- Fibres in soil
- Neighbour complaints
- WorkSafe involvement
- Expensive clean-ups that cost more than doing it properly
Using a professional asbestos removalist like PropertyHelp Ltd means:
- The job is legal
- The risk is contained
- Your property remains sale-ready
- You don’t inherit a permanent problem
Final Word
Asbestos fence removal isn’t about muscle or tools — it’s about control, patience, and boring discipline. That’s what keeps asbestos out of the air and out of your future.
If your fence looks old, cracked, or suspicious, treat it as asbestos until proven otherwise — and deal with it properly the first time.
Make Enquiry